

When it comes to siding installation, the weather barrier is your home’s first line of defense against moisture damage. While it serves as the first protective layer against water infiltration, from an exterior perspective, it is technically the last layer behind the siding. In other words, it is the last layer protecting your home if the siding itself fails. A properly installed weather barrier prevents water from seeping into the walls, reducing the risk of mold, rot, and costly repairs. However, many common installation mistakes leave homes vulnerable to these issues. In this post, we’ll cover critical areas where extra attention is needed to ensure the weather barrier does its job effectively.
The Role of the Weather Barrier
A weather barrier—also known as a moisture barrier or house wrap—acts as a protective layer that keeps water out while allowing trapped moisture to escape. Proper installation is crucial for maintaining your home’s structural integrity and energy efficiency. Failure to install it correctly can lead to water intrusion, mold growth, and compromised siding performance.
Key Areas Where Mistakes Happen
Even when a weather barrier is installed, improper detailing can lead to failures. Here are the most vulnerable areas and how to install the barrier properly:
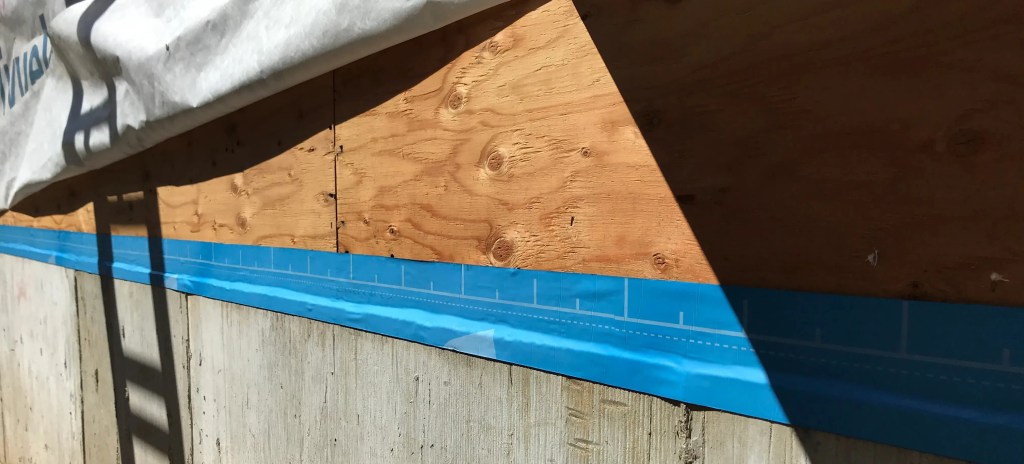
1. Base of the Wall: The First Line of Defense
One of the most overlooked areas during siding installation is the bottom of the wall. This is where moisture issues often begin, especially in renovations where the ground level cannot be lowered. Without proper protection, the lower portion of the wall can absorb water from rain splashback or soil contact, leading to rot and decay—just like we covered in our first blog post about buried siding.
Best Practices:
- Positive Overlap: Ensure the weather barrier overlaps correctly, directing water away from the structure.
- Additional Protection: Use a peel-and-stick or self-adhered membrane at the base of the wall. This extra layer bonds to both the sheathing and the concrete foundation, preventing moisture from wicking up into the framing.
- Proper Clearance: While maintaining at least 6 inches of clearance between siding and soil is ideal to reduce moisture exposure, this is often not possible during renovations. To address this challenge, applying a peel-and-stick membrane to the foundation and sheathing provides an additional layer of protection against moisture from rain splash and soil contact. Further steps to enhance protection will be covered in our upcoming discussion on siding installation itself.
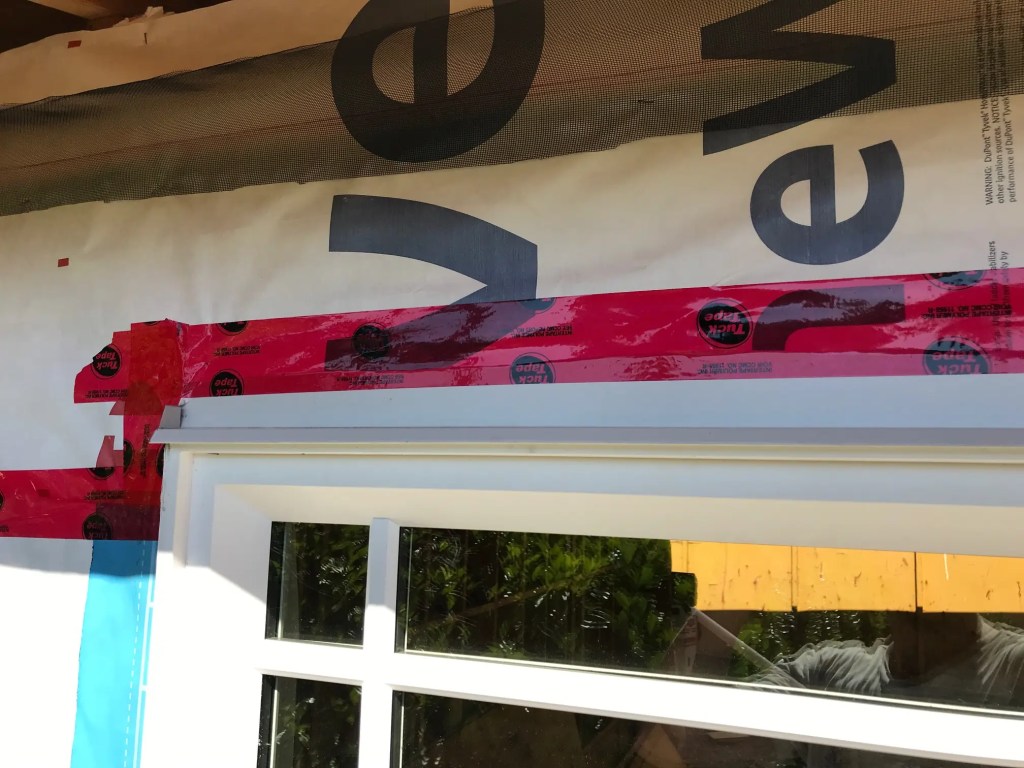
2. Around Windows and Doors: Sealing Critical Openings
Windows and doors are prime entry points for water if not sealed properly. Gaps around these penetrations can allow water to seep behind the siding, leading to hidden damage.
Best Practices:
- Flashing: Install proper window flashing that is overlapped by the wall membrane. If flashing is installed over the membrane, high-performance peel-and-stick tape membrane can be used. One of the best options is Wigluv Tape.
- Shingling Effect: Ensure the weather barrier is installed with a positive overlap over the top of the window and door flashing.
- Seams Sealing: All vertical seams taping is critical when Tyvek or similar products are used. If a peel-and-stick membrane is used, there is no need to tape the seams.
3. Wall Penetrations: Protecting Pipes, Vents, and Electrical Boxes
Any penetration in the siding—such as plumbing vents, HVAC exhausts, and electrical conduits—creates a potential entry point for water.
Best Practices:
- Flashing Tape: Seal around penetrations with flashing tape that adheres to the weather barrier.
- Pre-Made Flashing Boots: Consider using pre-made flashing components for common penetrations to ensure a tight seal.
- Sloped Sealing: When cutting the weather barrier for penetrations, create sloped or arched openings rather than straight cuts to help shed water.

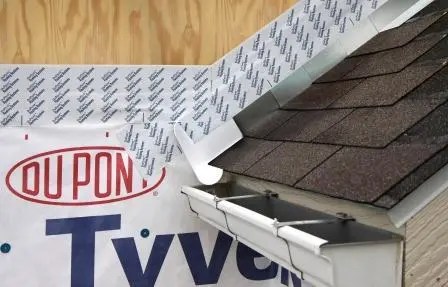
4. Roof and Wall Intersections: Overlooked but Critical
Where the roof meets an exterior wall—such as at dormers or extensions—water runoff can easily get behind the siding if the barrier isn’t installed correctly.
Best Practices:
- Step Flashing First: Ensure step flashing is installed before the weather barrier.
- Correct Overlap: The weather barrier should overlap step flashing, not the other way around.
- Kickout Flashing: Install kickout flashing at roof-to-wall intersections to direct water away from the siding.
Why Proper Weather Barrier Installation Matters
Cutting corners with weather barrier installation can result in significant damage that remains hidden until it’s too late. By paying close attention to these critical areas, you can prevent costly repairs and ensure your siding lasts for years.
Choosing the Right Contractor
Not all siding installers take the time to address these crucial details. A qualified contractor will:
- Follow best practices for weather barrier installation.
- Use high-quality materials like self-adhered membranes where needed.
- Ensure all penetrations, openings, and transitions are properly sealed.
At Tonic Siding, we prioritize long-term durability over quick fixes. If you’re planning a siding project in Vancouver, contact us to ensure your home is protected from the elements with expert installation techniques.
Want to learn more? Read our previous post on the risks of siding buried in soil here. Also don’t forget to read about Uncovering Hidden Damage During Siding Removal here. Stay tuned for our next post on proper siding installation around critical areas like windows, doors, and penetrations!
Need an inspection or siding upgrade? Contact Tonic Siding today!
